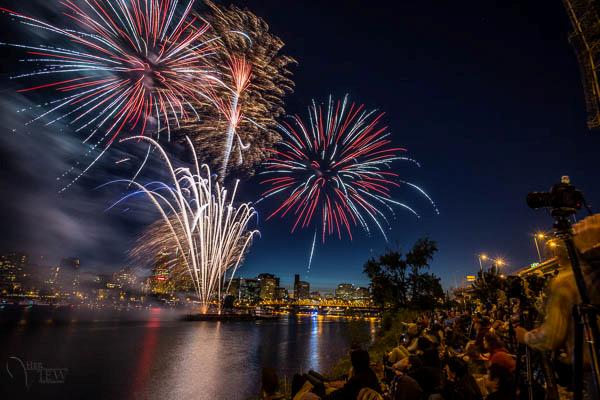
Firework celebrations are a great time for photography enthusiasts at any level to test out their skills. If you’re a beginner photographer you might have some reservations about trying to capture these brilliant light shows. Rest assured though, as long as you follow these steps you’re guaranteed to get professional-quality photos.
File format settings
First off be sure to change your camera's image settings for maximum image quality. For Nikon cameras set to NEF and for Canon cameras set to RAW. These settings will increase your image file size considerably, so make sure you have a big enough memory card to handle the increased file size and have an extra one on hand.
Keep it still
Using a tripod ensures that your camera will remain in the same spot and reduce the likelihood of your pictures coming out blurry or out of focus. Your exposure will be longer than normal so any amount of movement will reflect in a blurry image. Likewise, using a cable release helps for the same issues. You avoid touching the camera which could disrupt your shot.
Lenses
Bring several lenses if you have them. A telephoto lens is a great option if you arrive to your location late and have to be further away than you thought. Use a wide angle lens if you want to capture more of the background and fireworks. I recommend arriving early or a day ahead of time to see which bests works for your location.
**Exposure **
You can use a longer than normal exposure to capture entire bursts from the fireworks. It is recommended to turn off auto focus and manually set your focus since multiple fireworks will be going off at the same time. Try setting your focus to infinity. If your camera has noise reduction turn this on, as multiple long exposures in a row cause a heat buildup which adds unwanted noise to your images.
**Aperture **
Be sure to review your shots early on to make sure you’re getting as much detail and sharpness as desired. Start at ISO 200 at f/11 and work your way from there. If you are under exposed open the aperture. If you are overexposed close the aperture. Small apertures like f/2, f/2.8 let more light in, while smaller apertures like f/11, f/16 let less light in.
About the Writer
Zach Sprague, New Media Specialist

FreightCenter
As a new media specialist, Zach’s professional life is centered around the new and constantly growing field of digital media. He is constantly searching for the best ways to effectively promote FreightCenter’s brand digitally and strategically. When he’s not at work, he’s sharpening his photography and videography skills. His favorite subject matter? The places and faces of Tampa Bay.